A few minutes, folks! That’s all it takes. But before we find out how to configure and setup Intel Compute Stick, take a look at the basic stuff that will be required for it.
Things you’ll need beforehand:
TV (or Computer Monitor) with an HDMI port. Wireless Internet connectivity. USB Hub (Check out some of the best USB hubs available). Mouse & Keyboard, both preferably USB (Although you can use Bluetooth keyboards and mice with the Intel Compute Stick, it complicates the setup process, and taxes the single on-board chip used for both Bluetooth and Wi-Fi connectivity). Wall socket to power up the Intel Compute Stick (in case the display device doesn’t have a USB port for doing the same).
How to setup Intel Compute Stick?
Getting the Intel Compute Stick up and running is a piece of cake, essentially being a two stage process. Plug-in the hardware, configure the software, and you’re golden. In any case, here are the steps you’ll need to follow:
Hardware setup
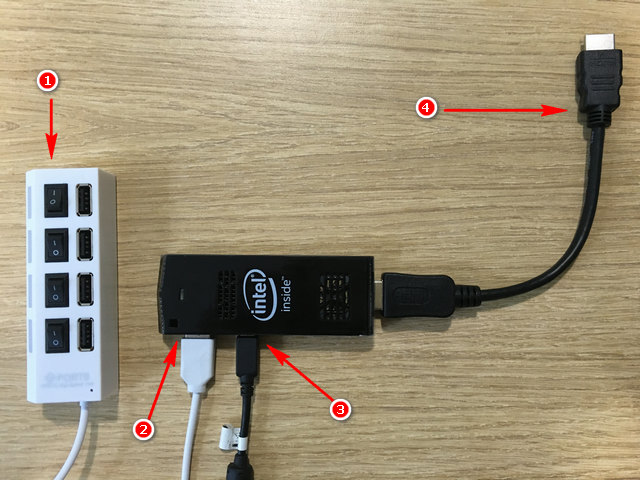
Use the image embedded below as a reference, and read through the steps that follow
Step 1: Connect the mouse and keyboard to the USB hub. Step 2: Plug-in the hub to the Compute Stick’s singular USB port. Step 3: Use the included micro USB cable to connect the Compute Stick’s power port to the TV’s USB port (for power supply). Step 4: Finally, plug-in the Compute Stick to the TV’s HDMI port, via the HDMI extension cable (optional). Now, power on the TV, and select HDMI as the source via settings (Obviously, these would differ based on the make and model of the TV or the computer monitor used). Once this much is done, it’s time to move on to the software configuration part, as discussed below.
Software configuration
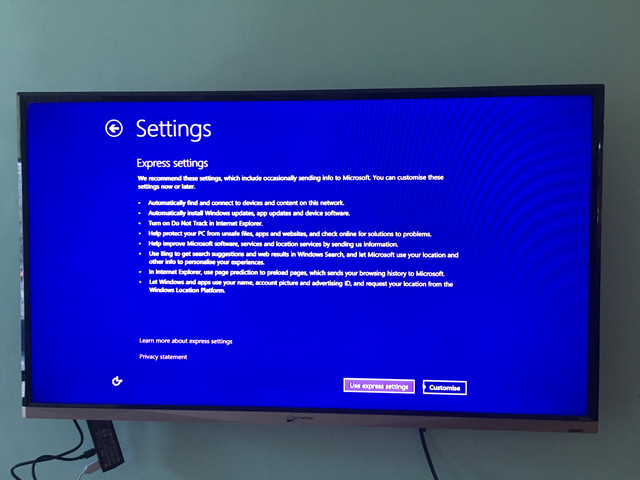
Step 3: The Intel Compute Stick comes with Windows 8.1 (with Bing) edition on-board. When starting up for the first time, you have to go through the same OOBE (Out-of-box experience) process, as you would while setting up Windows 8.1 on a normal PC. This includes connecting to the Wi-Fi network, setting up and Time and Language settings, and things like that.
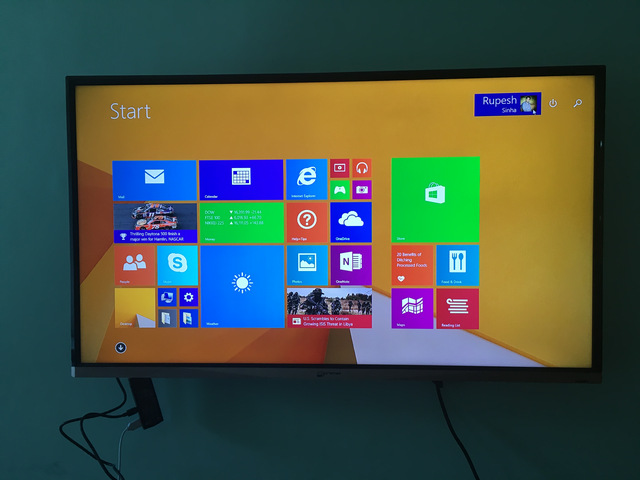
Note: During set up, Windows 8.1 prompts you to upgrade to Windows 10. However, this isn’t mandatory, and you can upgrade later if you wish to. Step 4: And we’re all set. Once everything is done, you’ll have the full Windows 8.1 running off the Intel Compute Stick, using the TV as the monitor. Take a look at the screenshot below:
Browse the web, play some games, or edit your documents all you want. And when done, simply shut down the Intel Compute Stick, just like a normal computer. How insane is that? SEE ALSO: Intel Compute Stick Review: Good, But Not Perfect
Make any HDMI capable display a computer
The Intel Compute Stick presents an affordable and (fairly) reliable way of computing on the go. Granted, it does need some additional hardware and setting up to get working, but once it does, it does so pretty well. So try this thing out, and make your voice heard in the comments below.